
Guide for setting up a VARA FM gateway:
Background:
Valley Center ARC has switched from using the Alinco dr-435t UHF radios (because of their difficulty to obtain) to using Motorola CDM-750 UHF radios. There is a complete explanation as to setting up these radios is located HERE. The remainder of setup items are on this page and associated links.
Hardware Setup (Computer):
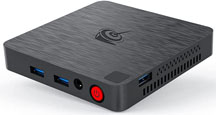
Any number of mini computers running Microsoft Windows 10 or 11will work. We chose the Beelink Thin T series of mini PCs. We used these mainly because they are relatively cheap and readily available. They are available on Amazon for anywhere between $120 to $150. They, as well as many others, are also available on e-Bay. Regardless of the computer you use there are several things to consider:
1) It must run Microsoft Windows 10 or 11 (I have been told some HAMs have had success with Raspberry Pi running Linux);
2) You will need a minimum of 2 USB ports (one for the external sound card and one for the keyboard/mouse. You will need another USB port if the keyboard and mouse use separate USB);
3) You need a LAN port and video monitor port (the Beelink computers use an HDMI port for this);
4) Most of these mini computers come with 4 GB RAM and a 64 GB SSD. These are plenty sufficient;
5) Highly recommend the computer runs on 12 VDC. Most of them do. Some of them recommend using a 19 VDC power supply, but they will also run nicely on 12 VDC. These are great as you won't need a Boost power supply (be sure you check and make sure it actually WILL work on 12 VDC !!). Also, check out the section regarding Powering the VARA FM Gateway below. For now, while setting things up, just use the supplied wall-wart power adapter.
BIOS Setup (Computer):
You can go ahead and remove most of the Bloat Ware that usually comes with PCs. You can keep the existing Internet browser with no need to install any other. You won't be using it anyway after you install the Winlink software.
Several things you will want the computer to do (and not do) in the event there is a power failure and the computer resets. First is to turn on Auto Power On so the computer will automatically turn on and you don't have to press the Power button each time; Second is to set it so Windows 10/11 automatically runs on restart; and Third is to add the Winlink Apps to run automatically at startup in Windows 10/11. Additionally, it is important to Disable the Windows Update Service so the computer will be unable to update any Windows software. If you fail to do this and Windows automatically updates its software (and it will) you will need to reset and restart the computer which will be inconvenient if the gateway is placed remotely.
Auto Power On:
*** Please note that many of the newer mini-computers do NOT have the ability to set Auto Power On. Be sure to check this capability before purchasing (unless you don't care).***
To locate Auto Power On you will need to enter the BIOS setup. This varies by computer, but most of the time simply press the Del key several times during the boot process. Once in the BIOS setup you may need to do some searching to locate Auto Power On. I've found it in a variety of different locations...some of which seemed unlikely. It should be under "CHIPSET" of something like that. Once found, use the UP/DOWN keys to select, click on it and select POWER ON. Go to SAVE and EXIT. That should be all there is to it. I would recommend testing it by cutting the power and then re-establishing it. The computer should start up without pressing the Power button.
Automatic Login in Windows 10:
You want this to occur so that you don't have to enter a Login and Password when Windows 10 starts. By default Windows 10/11 REQUIRES a Login and Password, so this will be a bit trickier to set up. Again, there a several ways of doing this, but we use the Registry Editor to modify the Registry. Please note that you can really screw things up if you incorrectly modify things, so I recommend you back up the registry before modification. there are numerous documents online explaining how to do this, so I won't belabor it here. The following is copied directly from Microsoft.com:
To use Registry Editor to turn on automatic logon, follow these steps:
-
Click Start, and then click Run.
-
In the Open box, type Regedit.exe, and then press Enter.
-
Locate the HKEY_LOCAL_MACHINE\SOFTWARE\Microsoft\Windows NT\CurrentVersion\Winlogon subkey in the registry.
-
Double-click the DefaultUserName entry, type your user name, and then click OK.
-
Double-click the DefaultPassword entry, type your password, and then click OK.
If the DefaultPassword value does not exist, it must be added. To add the value, follow these steps:
-
On the Edit menu, click New, and then point to String Value.
-
Type DefaultPassword, and then press Enter.
-
Double-click DefaultPassword.
-
In the Edit String dialog, type your password and then click OK.
Note
If no DefaultPassword string is specified, Windows automatically changes the value of the AutoAdminLogon key from 1 (true) to 0 (false), disabling the AutoAdminLogon feature.
-
-
On the Edit menu, click New, and then point to String Value.
-
Type AutoAdminLogon, and then press Enter.
-
Double-click AutoAdminLogon.
-
In the Edit String dialog box, type 1 and then click OK.
-
If you have joined the computer to a domain, you should add the DefaultDomainName value, and the data for the value should be set as the fully qualified domain name (FQDN) of the domain, for example contoso.com..
-
Exit Registry Editor.
-
Click Start, click Shutdown, and then type a reason in the Comment text box.
-
Click OK to turn off your computer.
-
Restart your computer. You can now log on automatically.
Add the Winlink Apps to run automatically: (be sure to download the latest versions)
When the computer restarts, as in a power failure, you will want all three Winlink VARA FM gateway applications to start automatically after Windows starts. First off, you will need to download and install them. Also, pay the appropriate one-time fees to the Winlink organization. The Winlink site has a large amount if incredible information on setting things up and operation. I highly suggest you peruse them. Go to downloads.winlink.org to obtain the needed applications.
Under User Programs download Winlink_Express_install_1-6-1-0.zip. You can get the latest version if you download it from the Winlink site under User Programs. Follow the instructions on the Winlink.org site to install.
Under Sysop Programs download two files: RMS_Packet_install_2-1-41-0.zip and RMS_Relay_install_3-1-13-0.zip. Again, download te latest versions from the Winlink site under Sysop Programs.
The fourth application you will need is VARA FM obtained from rosmodem.wordpress.com. Download VARA FM v4.2.2 (VARA for FM transceivers) and install according to the Winlink instructions. If VARA FM and Winlink Express are installed correctly VARA FM will start automatically when Winlink Express starts.
Next, you need to get all the applications to start automatically. Again, this is copied directly from the Microsoft.com site.
-
Select the Start button and scroll to find the app you want to run at startup.
-
Right-click the app, select More, and then select Open file location. This opens the location where the shortcut to the app is saved. If there isn't an option for Open file location, it means the app can't run at startup.
-
With the file location open, press the Windows logo key + R, type shell:startup, then select OK. This opens the Startup folder.
-
Copy and paste the shortcut to the app from the file location to the Startup folder.
The First application should be Winlink Express;
The Second application is RMS Packet;
The Third application is RMS Relay.
Mooneer Salem has an excellent presentation on setting up these applications which can be found HERE.
Also, the Central Virginia Digital Network has a excellent description for setup cvadn.net/winlink-gateway-configuration/
Another source is the Venture County ACS/ARES Communications site.
Disable the Windows Update Service:
As with everything else, an Internet search for disabling the Windows Update Service will reveal several methods...some much easier than others. The following is the method we most often use.
1) Press the Windows logo key + R, type services.msc, then select OK. This opens the Services folder.
2) Select the Windows Update service from the Services list by double-clicking on it.
3) In the resulting dialog, click "Stop" if the service is started.
4) Click on the "General" tab and change the "Startup Type" to "Disabled".
5) Click OK and restart the computer.
Some have had issues disabling the update service with this method, especially with Windows 10 Home version. Although we have not had an issue here, some have needed to modify the Windows registry. I won't go into that, but there are references online as to the procedure.
Powering the VARA FM Gateway:
Power considerations are as follows:
1) The radio voltage range is between 12 VDC to 15 VDC at about 3 to 4 amps max during transmission if you are running 20 or so watts.
2) The mini computers that are rated at 12 VDC. Some are rated for 19 VDC, but will usually operate at 12 VDC. These are usually not a problem. However, those that are 12 volt rated will have a issue if operated much above 12.5 to 13 VDC. You can add a buck/boost DC to DC power supply which will convert anything from 8 VDC to 28 VDC to an output of 12 VDC. The computer we use typically only draw 200 to 500 ma, so a fairly small power supply is all that is required (on e-bay for around $3 to $5).
3) Battery backup is highly recommended in the event (and it will) power goes out. This requires shore power (120 VAC), and/or solar power, and/or other off-grid power source.
4) Charging system for battery backup and power for radio and computer.
If your system is completely off-grid where a battery backup is unnecessary, or battery power is supplied prior to shore power (as is the case for one of our VARA FM Gateways) then a simple power supply adjusted to 12.5 VDC will adequately power both the radio and computer without any further voltage adjustments. However, this is seldom the case as described below.
Most of the time you will need battery backup. In this case a battery charge controller and appropriate power supply are required. We use the Epic PowerGate for power distribution and as a charge controller. We also use Astron linear power supplies which have the ability to vary the voltage (most of their linear power supplies will do that). The supply will need to be adjusted depending on the battery type (LiFePO4, AGM, Flooded Lead Acid). As far as the radio is concerned, any of the required charge voltages will also be appropriate for radio operation. So no issues here. HOWEVER, the charge voltages are most likely going to be too high for the computer. In that case you will need a voltage converter to get the required 12 VDC (and not more than 12.5 VDC) for the computer.